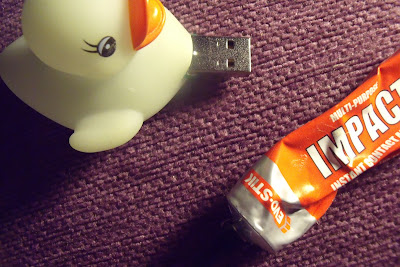
This project was originally inspired by this Lego Stick from Instructables but for the life of me could not find a single suitable piece of Lego. Then I saw this Action Man head and for a split second considered ripping the eagle-eyed head off Clive, the husband's beloved and battered childhood hero. But not wanting imminent divorce, instead I went looking for other fun things to surgically enhance. And so I bring you the 'Demise of the Rubber Duckie'.
I'm so excited for my first tutorial, I only wish I hadn't waited till the little man was in bed and have to shoot it all in the light of the anglepoise! I have been updating my FB status as I was crafting, started with an innocuous 'USB stick meet hammer' which plenty of people assumed was a jesting comment owing to my frustration with a faulty memory stick - little did they know I was at that point kneeling on my kitchen floor wielding a real life hammer at a tiny innocent data-traveller.
Step one - using whatever means you deem neccessary, remove the plastic casing from around your stick. I have had cheapy ones in the past where a knife inserted through a crack in the casing worked, this one was a little sturdier, hence the hammer incident. In the end you want the internal bits to be in tact and to look something like this:
Step two: meet Vinnie's Rubber Duckie:
cute right? Here's another pic so you can remember what he looked like...
... before my next FB update 'in which the rubber duck meets the kitchen knife'
(viewers of a sensitive disposition should look away now)
yes, that's right, I am asking you to impale the duck in the name of art and crafting.
You need to make a slit just slighty smaller than the width of what remains of your memory stick
(I am squeezing the duck here to show the gash in his intestines, yours should look like a closed slit)
Step three: 'rubber duckie gets a body mod' - slide your stick into the hole to check for size, you want it to fit snugly otherwise when you pull your duck/stick out of your computer duck and stick will part ways
Step four: add glue as neccessary. You will need to superglue around the opening, but be aware you want as much of the silver part of your stick uncovered as you can, you don't want to to end up with a too short stick that won't fit in the computer! Also be warned, most rubber duckies have a valve thing on the bottom so you can squeeze bathwater out of them, you don't want glue seeping out of this hole, I would suggest go lightly with the glue and set it on top of newspaper while crafting and drying.
Step five: once dry insert into laptop/pc/mac/computer device type thing and load up with wonderful things, wordy essays or boring work stuff:
and an extra cuteness I didn't expect, my stickduck has a flashy blue light when data is being transferred:
And there you have it, super fun & still cute, perfect size for a little treat.


this is SO amazing!
ReplyDeleteI looked away in the knife scene LOL it's kinda strange lol
too bad I haven't got my duck anymore :(
but I think I'll try this DIY with anything I can now! :D thanks for sharin!
-Nico-
this is such a clever idea!
ReplyDeleteWow, I love this! Super cute tutorial too!
ReplyDeleteAdorable! What a clever idea!
ReplyDeleteThat is genius... I'm off to my bathroom. Thanks!
ReplyDeleteNew reader - just wanted to stop by and say this is such a cute idea! Looking forward to more of your blog!
ReplyDeletewww.freakedoutnsmall.blogspot.com
ha that is so clever i love it. just found your blog tina x x
ReplyDeletehttp://scratchycatcrafter.blogspot.com